
Photo: deco & style
With template
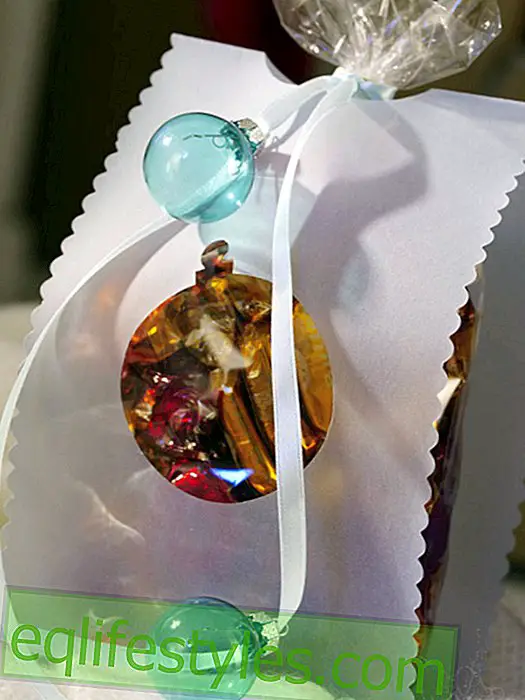
A bulging Easter basket makes children's eyes shine. With this craft template, you can easily make the basket yourself.
This is what you need for the Easter basket:
- Square paper sheet (Basic Pattern Dot Blue 30.5 x 30.5 cm and Basic Pattern Circle Blue each about 1.50 € www.pandurohobby.de)
- Border punches (by Fiskars, via www.udig.de, Fiskars 2-in-1 corner & punch punch tip item no .: 5119, approx. 24 Euro)
- Sweets
- metal ruler
- Cutter with cutting pad
- pencil
- glue stick
- scissors
Here you will find the template:

And that's how easy it is:
1. Decorate two opposite edges of the dotted sheet with the border punch.
2. Measure the newly created piece (here 28.5 cm, by punching the width decrease) and shorten the sheet at the non-punched edge to this width. To do this, use a cutter with a metal ruler.
3. Using pencil and ruler, divide the sheet on the unprinted page into nine equal parts (9.5 x 9.5 cm).
4. Align the sheet with the punched edges on the right and left. The pattern is on the bottom.
5. Using the pencil lines, cut the lower and upper longitudinal lines with the cutter to the edge of the middle square. Do not cut the middle square.
6. Fold all edges inwards. Push the basket together so that the punched corners meet on the outside. Glue overlapping parts together with glue stick.
7. Cut a 5 cm wide by 30.5 cm long strip from the second sheet. Both outer edges punch.
8. When Henkel stick to the inside of the basket.
9. Fill Easter basket with sweets.
The craft instructions for download can be found here!