


- Now it's getting cozy!
- role playing game
- Designerstück
- Upholstered Pouf
- Dress up the light
- Refine the cabinet
- The original
Now it's getting cozy!
New living happiness: If you feel like change, just spice up your existing furniture. The results are amazing.
"Sustainability is playing an increasingly important role in the living space, too - instead of disposing of furniture, it is simply being redesigned to protect the environment and the wallet, " says Eva Brenner, living exponent and presenter of "Zuhause im Glück" on RTL 2. We take their words to heart and make our furniture with just a few simple steps.
role playing game
Picture above: The simple wooden cabinet was simply not up-to-date anymore. Trendy gray and decorated front panels for a wow effect. How it works? Paint patterns - using a textured roller works very easy.
You need: wardrobe, structural roller, gray and white wood color, paint roller, crepe, porcelain attacks.
And this is how it's done:
Painting the cabinet: First of all, unscrew metal parts such as hinges or glue them with painter's crepe. Remove old handles as well. Then lay out the work surface with foil to protect the floor from possible paint splashes. Coat wardrobe with a matte gray wood color and let it dry well.
Applying the pattern: Evenly coat the back roller of a textured roller (eg "Patterned Paint Roller No. 6" by The Painted House on Etsy) with white wood paint. Move the roller from top to bottom over the desired cabinet surfaces, allow the paint to dry well again.
Screw on metal parts: Removed metal parts such. B. attach the hinges again. If necessary, drill holes with a cordless drill for the new porcelain attacks (eg from Stilmelange). Push handles through and tighten with nuts, possibly tighten with pliers.
Designerstück

With a striped cover and a practical armrest tray, a simple armchair gains in size enormously. The unique piece of furniture has become our absolute favorite after the transformation. For a harmonious overall look, use the reference to a color that also appears in your carpets, curtains and Co.
You need: armchairs, furniture feet, three multiplex panels (longitudinal miter cut), drill with hole saw attachment, thin wooden plate, screw clamps, wood glue, white and striped fabric, sewing machine.
And this is how it's done:
Replace feet: Unscrew the original feet of the chair (here: model "Karlstad" with cover "Blekinge" from Ikea) and attach trendy new ones. Our tip: The company Prettypegs offers original models, which fit especially on Ikea furniture (here: model "Hillevi", 4 pieces about 68 €).
Build tray: Mark the center of the beverage well on a multiplex board. Saw out an 8 cm circle with the hole saw attachment. Glue the two side plates together at the miter cutting edges with the center plate. Press together with screw clamps and allow to dry. To prevent dripping on the sofa due to the beverage sink, glue a thin wooden plate to the bottom of the shelf and press it together with screw clamps to dry.
Sew pocket: For the side pocket on the back of the white fabric record the desired dimensions. Cut piece of fabric, fold right to right and sew on three sides. Turn, close the open side. Attach dividing seams, sew the bag onto the armrest cover. Tip: For remote control or glasses case additionally sew a small extra bag on the side pocket.
Seat cushion cover to be made: Cut the outer fabric (eg "Retiro Verde" by KA) according to the seat cushion and sew to the cover. Possibly. include a zipper. Our tip: Anyone who is not versed in sewing can also have the cover made by the seamstress.
Upholstered Pouf

Thanks to its thick cover, the former side table can also be used as a stool or footrest ... and is almost unrecognizable ...
You need: table, foam, upholstery fabric, cotton wool, sandpaper, gray acrylic paint, brushes, scissors, staplers, pins, if necessary saw.
And this is how it's done:
Painting: If necessary, saw off the table legs to the desired height. Then sand all surfaces of the table (sandpaper 180 grit). Remove furniture from the wood dust with a lint-free cloth and paint with gray acrylic paint. Let the paint dry well.
Upholstery: Cut houndstooth upholstery fabric (eg Dedar "Poulette" design): in the dimensions area x height of the table plus foam board (plus the addition to secure the fabric to the underside of the table). Place with the left side up on the floor, correspondingly cut cotton fleece on top. Place foam (eg of foam Godglück) and the inverted table on it. Pull fabric and fleece tightly upwards, making sure that the pattern does not warp. Staple both layers to the bottom of the table. Start by working from the middle of a page to the left and right. Leave about 15 cm open towards the corners. Our tip: Work best in pairs.
Obtaining: Place the table on its feet and fold over the still open fabric corners in such a way that clean vertical edges are created. Fix these with pins. Cut off excess fabric at the bottom edge and staple the open edges to the bottom of the table.
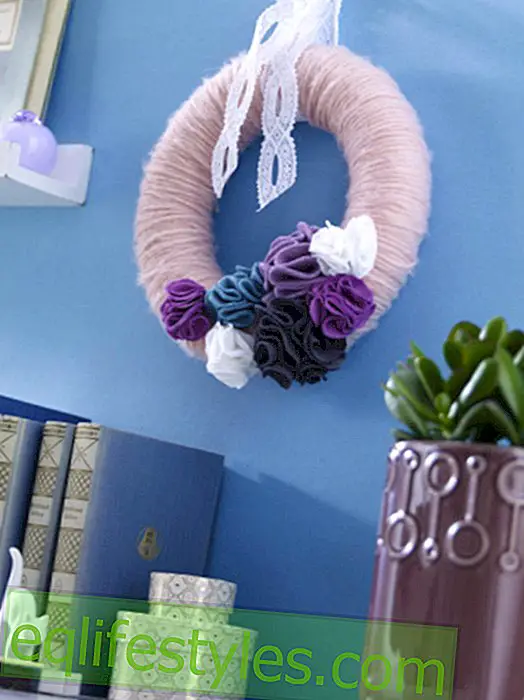
Dress up the light

Wallpaper for the lampshade: roll it over the back of a pattern wallpaper, drawing the outlines in pencil. Cut wallpaper with a cutter. Apply a strip of adhesive tape to the upper and lower edge of the lampshade, fix the wallpaper on it, press down well.
Storage box on wheels, approx. 57 €: House Doctor. Clock, about 30 €: Car. Bed linen "Gäspa", about 30 €: Ikea
Refine the cabinet

The pretty pharmacy cupboard is great for storing jewelry, beauty products or sewing utensils. So that it itself becomes an eye-catcher, you can
simple wooden buttons (partially) replaced by high-quality porcelain attacks.
Similarly seen: Apothekerschränkchen "Petite", about 40 €: Weltbild.de. Porcelain buttons, from about 5 €: Stilmelange
The original

Well, would you have recognized her? These are our "originals", the parts that had served us out - and the second spring as a chic upcycling - may now spend furniture ... What a " old make new " conversion ...
Need more upcycling ideas ? Here are some tips from Pinterest
(Photos: deco & style, manufacturer)