
Photo: deco & style
Knotting with the weaver knot
In the 70s, macrame flower baskets were extremely popular. Now the knotting technique is celebrating a cool revival. Here are 5 simple DIY ideas.
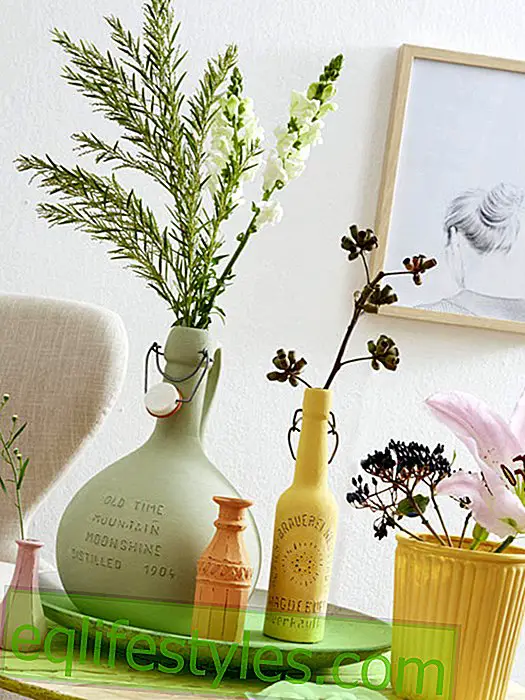
That's what you need for the hanging staff
- different colored cords (department store / haberdashery)
- Curtain rings wooden balls (craft shop)
- Fruit bowl (alternatively wooden plate)
- scissors
And that's how easy it is:
Fruit bowl: Cut 8 equal lengths of cord, each approx. 2 m long. Put the cords around a curtain ring and tie them together with a piece of cord. Now 16 threads are hanging down 1 m). So that afterwards all knots are at a height, hang the curtain ring best for knotting. Now knot the first knot of the knot about 20 cm below the ring as follows: Always put four adjacent threads together. The two outer bands are the working bands that hang down the two middle bands. The outer bands are knotted around the inner ones. Start with the right band: Lay the right band over the two middle bands to the left, then under the left band. Place the left band under the two middle bands to the right. Pull the left strap from the back to the front through the loop of the right strap. Now the tape is knotted. Tighten the knot carefully. This node is the base node. Tie 7 knots in this way. Do the same with the other 3 strands of 4 threads. Then thread a wooden ball over the two middle threads of each strand and knot 5 macrame knots under each ball again.
For the net pattern, after approx. 30 cm under the last knot, pick up 2 threads from the knot of one strand and 2 threads from the adjacent strand. Then put these four adjacent threads together again and make 5-6 macrame knots. Then work in wooden balls again. Then plait 5 knots again. Place the fruit bowl between the knots and put the cord ends together at the bottom, then tie them together with a different colored cord.
For the other vessels work accordingly, z. B. with or without wooden balls. Alternatively, vary with the distances between each node.
Prop: front shell: Ferm Living; about 54 €, hook: Car furniture; 2, 90 €, rest: own

You need this for the stones:
- thin wool
- Mineral stones
- superglue
- wood Beads
- scissors
And that's how easy it is:
1. Cut 6 pieces of equal length from the thin wool thread, the thread must be three times longer than the stone.
2. Knot all 6 threads together and glue them to the top of the stone with superglue.
3. Loosely connect two adjacent threads with a double knot. Make sure that large stitches are formed. Pick up the next two threads and repeat the process. The knots should all lie horizontally at the same height.
4. When all threads are knotted, the second row follows. To do this, take a thread from the first node and a thread from the following node and join them with a double knot, creating a new stitch in the middle of the previous stitch. Repeat this process until the second course is finished knotted.
5. Same procedure for the third row. Repeat the process until you arrive at the end of the stone.
6. Knot down.
7. Now you can thread wooden beads onto the ends.
Props: Leader: Car Furniture; 69, 80 €, Curtain: Liv Interior about Car Furniture; 94, 80 €, hook: Car furniture; 2, 90 €, rest: own

What you need for the storage baskets:
- Cotton cord (haberdashery / department store)
- Embroidery thread in black, pink and light blue
- sewing needle
- scissors
And that's how easy it is:
Soil: Roll cotton cord gradually to a screw about 6 cm in diameter. Sew together the individual layers of the drawstring with embroidery thread with a simple tension stitch.
Sidewall: For the side wall, continue the drawstring upwards and also gradually roll to a height of approx. 6 cm. Again fix each single layer with an elastic stitch. Put the cord end in and sew.
Sew the second container about 12 cm high.

That's what you need for the magic of light:
- Band in blue (craft shop)
- Mason jars (eg from Butlers, price between 1.99 € and 4.99 €)
- Candles (eg from Butlers, price 0, 79 € per pcs.)
- scissors
And that's how easy it is:
1. Cut off pieces of the same length 8 times, the thread must be at least three times longer than the mason jar.
2. Knot all 8 threads together and put them around the bottom of the jar.
3. Loosely connect two adjacent threads with a double knot. Make sure that large stitches are formed. Pick up the next two threads and repeat the process. The knots should all lie horizontally at the same height.
4. When all threads are knotted, the second row follows. For this you take a thread from the first knot and a thread from the following knot and connect them with a double knot, so that a new stitch is formed in the middle over the bottom two stitches. Repeat this process until the second course is finished knotted.
5. Same procedure for the third row. Repeat the process until you have reached the edge of the binoculars.
6. Take all thread ends together and knot them at the upper end.
7. Attach to a hook or curtain rod. Put candles in the glasses.

What you need for the cup holders:
- Zpagetti wool in 2 colors (department store about 14 €)
- beverage bottle
- wood Beads
- scissors
And that's how easy it is:
Tie a ribbon tightly around the opening of the beverage bottle and knot it. Now cut six equal lengths, about three times as long as the bottle, and take double. Tie the bands at regular intervals on the band around the neck of the bottle with a loop. Now knot four bands as follows: The two outer bands are the working bands that allow the two middle bands to hang down. The outer bands are knotted around the inner ones. Start with the right band: Lay the right band over the two middle bands to the left, then under the left band. Place the left band under the two middle bands to the right. Pull the left strap from the back to the front through the loop of the right strap. Now the tape is knotted. Tighten the knot carefully. This node is the base node. Repeat this process three times per strand of 4 bands. Knot all 3 strands in this way. When all the threads are knotted, the second row follows knots. For the net pattern take 2 threads from the first strand and 2 threads from the following. Knot this again four times as described above. Depending on the length of the bottle, make row by row in this way. Put all the ribbons together at the bottom and tie them together with a ribbon. Now you can add pearls or individual knots.
For the handle: Cut two long bands, each approx. 2.5 m long. Double tap ribbons and fasten them side by side on the strap at the bottle opening with a loop. Now use the macrame knot described above until the handle is long enough. Automatically the cord twists. Connect the ends to a double knot.
Props: Knobs: Muuto via Connox; 17.90 € and 23.50 €, rest: own