


- Tea Time
- Material:
- Knitting instructions for a teapot warmer
- Knitting instructions for a tea glass worm
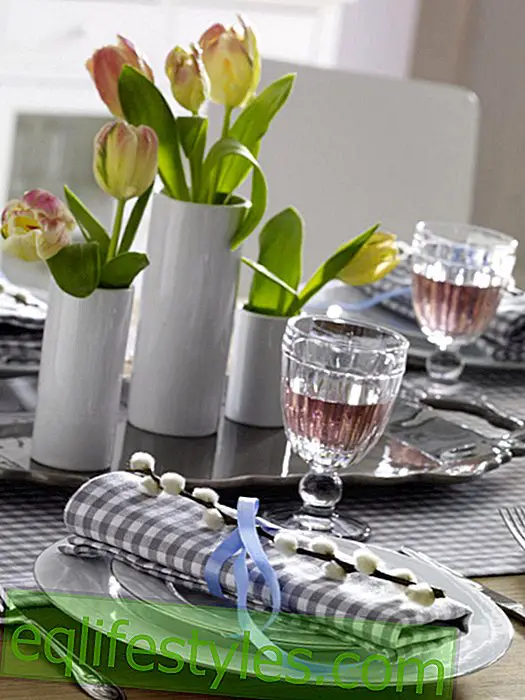
Tea Time
Tea and coffee are guaranteed to stay warm longer with this sweet pitcher and tea glass warmer.
The abbreviations at a glance:
- right: right
- Left: Left
- Round: round
- str .: knit
- MS: pattern set
- M .: mesh
- Nd: needle
- initially: increase
- U .: envelope
- bind off: bind off
- LL .: run length
- continued: continuous
- R .: row
- initially: increase
- Rdm .: edge stitch
- decrease: decrease
- over / under: cover
- Connection: stop
- knl .: ball
- N .: Needle
- U: envelope
- Lm .: air mesh
Dimensions:
Teapot warmer: circumference approx. 48 cm, height approx. 22 cm, suitable for a typical English teapot in spherical form, with approx. 1.2 l content.
Tea glass warmer: circumference approx. 24 cm, height approx. 10 cm, suitable for usual drinking glasses.
Material:
- Schachenmayr original soft tweed
- Tea Cozy:
- 100 g in Fb 00005 sand
- From Milward Knitting Needle No. 4.5 - 5
- Needle no. 4.5 - 5
- cable needle
- Auxiliary needle or a Maschenraffer
- 1 button (15 mm diameter)
- Teeglaswärmer:
- 50 g in Fb 00005 sand
- From Milward Knitting Needles No. 4.5 - 5
- cable needle
Smooth left:
Knit on the left in stocking st.
cable pattern:
Knit over 20 or 23 sts after knitting. Only the first or the odd rd are drawn, knitting the sts in the back or straight row as they appear. For 2 consecutive envelopes in the back of the 1st envelope left, knit the 2nd envelope on the right.1x the 1.-20. Knit R, then 9.-20. Always repeat R / Rd.
Knitting tension:
Smooth left 16 M and 22 R / Rd = 10 x 10 cm. The 23 sts of the braid = about 10 cm
Knitting instructions for a teapot warmer
Cast on 90 sts and knit one st in stockinette st. Continue working as follows: Randm, 12 sts on the left, 20 sts on the cable, 24 sts on the left, 20 sts on the pigtail, 12 sts on the left, marginal sts. Continue in this pattern, increasing 3 sts over each cable in the 3rd row, as shown, = 96 sts.
At a height of 2 cm, divide the work into 2 halves, knit the first 48 sts in accordance with the pattern and close the remaining 48 sts on a needle or a leno.
On the right working edge (slit for the handle) take off a total of 5 sts, on the following front, knit the 1st and 2nd sts of the R on the left. Repeat this decrease 4x in every 6th row.
At the same time remove 5 sts for the neck of the can beak on the left side, cast off 1 x 3 sts in the following row, then knit 2 times in each 2nd row (back), knit the 1st and 2nd sts of the R on the right (Fig. 1 st right off, knit 1 st on the right and pull off the raised sts) = 38 sts after all decreases. In 14.5 cm height from stance stop all sts.
Take the first disused 48 sts again and work the same way, bind off 1 x 3 sts for the first decrease on the right side and knit the first sts on the left side for the further decreases, the last left sts on the left side knit together. Distribute 76 M of the two halves at a height of 14.5 cm (= 19 sts per needle). Start with the 1st needle at the slot for the handle and knit in the round.
Continue as follows: knit the first two sts of the 1st needle on the left, knit 3 sts in the center of the plait on the right (2 sts on the right, knit 1 st on the right and pull off the raised sts), the last two sts on the left of the second needle knit together, knit the first two sts of the 3rd needle on the left, knit 3 sts in the middle of the pigtail on the right and knit the last two sts of the 4th needle on the left side = 68 sts.
Knit the first and last 6 sts of cable as before, knit the middle sts to the right. Repeat these declines 2x on every other round = 52 sts. Knit 10 more sts, knit the middle sts of the cable stitches to the left. Continue the dec on every 2nd round as described above, but knit the middle 3 sts over center of ply = 12 sts. On next round knit 2 sts left = 6 sts. Pull the thread through these 6 sts, tighten and adjust Sew thread. Total height = 22 cm
Completion:
Crochet the slot for the handle and the stop edge as well as the opening for the can beak with Krebsmaschen (= solid M from left to right). Start in the middle of the slot. Just before the end of the slit, work a buttonhole with 4 stitches, then continue crocheting with cancer mesh. Sew on the button at the other end of the slot. Make a pompon approx. 6 cm in diameter and sew it to the tip of the can.
Knitting instructions for a tea glass warmer
Cast on 22 sts and knit one st in left st. Continue working as follows: Randm, 20 M in the cable pattern, Randm. As shown in the 3rd row, increase 3 sts = 25 sts in approx. 22.5 cm height (1 x the 1st to the 20th R, 2 x the 9th to the 20th R, and 1 x knit the 9th-14th rounds = 50 R) in the following row, knit the 9th and 10th sts of the braid pattern on the right, knit the 12th and 13th sts on the left, and knit the 15 th and 16 th sts on the right (1 Take off M right, knit 1 st on right and pull off the off sts) = 22 sts. In the following pattern, knit sts as they appear. Cast off all sts in next row.
Total height = approx. 24 cm.
Completion:
Tighten, moisten and allow to dry the part. Sew stop and edge down and put the tea glass warmer over a glass

Here you will find the instructions for you to download at home!