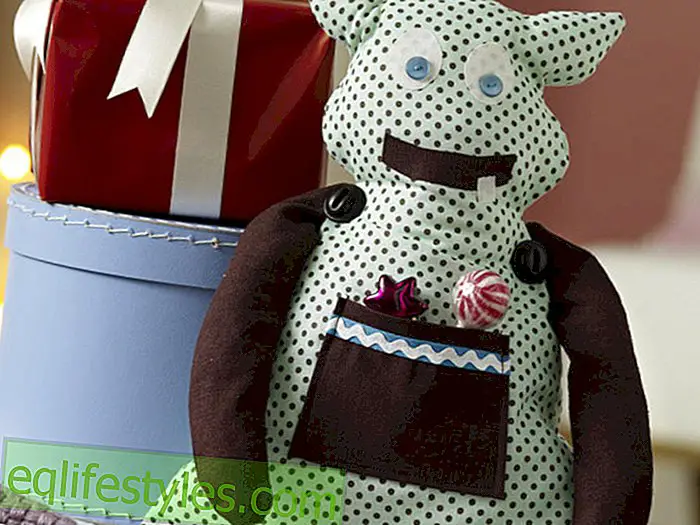


Photo: deco & style
Snapshot for eternity
With beautiful photos you can do much more than packing them in a picture frame. Here are four simple photo ideas to make your own.
You need this for the candles:
- Computer, laser printer and printer paper
- white paper napkins
- Adhesive strips (tesa)
- 2 pillar candles
- baking paper
- scissors
- Iron with tea towel
- heat gun
And that's how easy it is:
1. Use a pair of scissors to cut off the small perforated edge of the white napkin.
2. Open the napkin, place the dish towel over it and iron the folds from the napkin.
3. Cut the napkin one size smaller than DIN A4 and fix it with adhesive tape around the printer paper. Important: There must be no wrinkles, it must be completely flat.
4. Print the motif on the printer paper with the attached napkin.
5. Loosen the napkin from the paper and cut the top print layer of the napkin to the desired size.
6. Place motif on the candle.
7. Wrap the baking paper tightly around the candle, so that the motif does not slip on the candle.
8. Walk over the subject with the hot air blower. The merging of candle and motif is done by making the subject look like it is "wet".
9. After the blending process, remove the baking paper, the printed napkin layer is completely melted into the candle.
Prop: tray: depot, for € 14.99, table: www.car-moebel.de, set of 2, € 209, armchair: Ikea, "Strandmon" Nordvalla light gray, for € 199

What you need for the tea towel:
- Computer and laser printer
- photo
- Cotton dish towel
- Scotch tape
- lavender oil
- Small bowl
- wooden spoon
- document
- Iron
- baking paper
And that's how easy it is:
1. Print the photo mirrored with the laser printer. Place paper right to right on the fabric, fix with Tesa film if necessary. Apply lavender oil to a small part of the motif with the brush first.
2. Using the wooden spoon, rub vigorously and persistently over the spot without tearing the paper. Rub until the motif has transferred to the fabric. Motif in this way gradually with the oil transferred to the fabric.
3. Then iron to fix the pressure at the hottest stage. Between ironing board and fabric, as well as between fabric and iron baking paper to protect against possible oil residues.
Tips:
1. The subject can only be transferred with the lavender printing process if it has been printed with a laser printer - inkjet printing does not work. Alternatively, the motif can also be copied in the copy shop.
2. Textiles that are printed with the lavender printing process can also be washed up to 30 degrees.

You need this for the flower vase:
- Computer and printer
- Photo tattoo film (eg from Avery Zweckform)
- vase
- Clearcoat (craft shop)
- brush
- Flowers: pink pepper, astrantia, sedum, freesia, snow berries, alstroemeria, serruria
- secateurs
- knife
And that's how easy it is:
Vase:
1. Print the photo subject on tattoo film. Transfer the motif to the vase according to the manufacturer's instructions.
2. After the film has dried well, fix the motif with clear varnish.
Bouquet:
1. Free the stems of the flowers from excess green.
2. Assemble flowers to a mixed bouquet, making the stems spirally.
3. Shorten the bouquet to the vase length with the rose scissors.
4. Cut the ends of the stems diagonally for better water absorption.
5. Put the bouquet loose in the water-filled vase.

What you need for the wall plates:
- Computer and inkjet printer
- photos
- Ceramic foil Avery Zweckform My Design for Inkjet (eg from Saturn, about 10 € for 2 sheets in DIN A4)
- Adhesive mounting for wall plates (from the hardware store)
- different sized plates
- scissors
- Iron
- baking paper
- Small bowl of water
- soft cloth
And that's how easy it is with ceramic foil from Avery Zweckform My Design Inkjet:
1. It's best to scan or download the photo subject and bring it to the appropriate size. Then print the subject on the coated side of the transfer ribbon with the inkjet printer. It is important that the motif is printed mirror-inverted, so that it can be seen laterally on the plates.
2. Cut out the printed motif roughly.
3. Now the transfer foil is connected to the carrier foil. For this purpose, the carrier film is cut to exactly match the printed carrier film.
4. Place the printed side of the transfer ribbon on the coated, glossy side of the carrier foil.
5. Iron with the iron over the foils. Tip: Switch off steam function of the iron and cover the film with baking paper.
6. Press the iron on the slides for about four seconds without moving it.
7. Turn the slides over and press the iron again for four seconds.
8. Allow the slides to cool and cut out the motif exactly.
9. Put the foil in lukewarm water for about a minute. As a result, the motif separates from the film and can be placed on the desired location. The plate should be dry and clean for this.
10. Wipe off with a soft cloth the remaining moisture, then dry the motif for at least one hour.
11. Cook the dishes at 175 degrees for about half an hour on a medium rack in the oven. To cool the dishes can remain in the oven.
12. If it is taken out anyway, it should not be placed on cold metal plates, otherwise it could lead to stress cracks.
13. According to the manufacturer, the plate with the motif is dishwasher safe. To be on the safe side, you should rather rinse the plate by hand.
14. Fix the adhesive suspension for the wall plates according to the manufacturer's instructions on the back of the wall plate.
Props: Basket: Ikea, "Gaddis", for € 5.99 Wall Color: ARGILE - interior matt - color T521 - petra, about www.argile.de/products-> Interior Matt.