
Photo: deco & style
Table cover you
Advent, Advent, a little light is burning. On Advent Sunday, we gather around the coffee table and there may not be missing the right table decoration.
Delicate pink, a touch of white combined with pine cones and cinnamon sticks and the perfect table decoration for the Advent coffee .
Whether with the girls or the whole family, the playful decoration elements will enchant your guests and the Christmas spirit is sure to come.

You need this for the candle deco from cones:
- 3 spruce cones
- Dekoband about 60 cm (eg Depot)
- Tree Candle Holder
- Tree candles white
- scissors
- Hot glue gun and hot glue
And that's how easy it is:
1. Place two spruce cones next to each other, place the third centered on top.
2. Wrap the deco tape and knot it to the bow at the side of the top pin.
3. Remove the candle holder from the clip and stick it in the middle with hot glue on top of the tape.
4. Insert the tree candle.
Do not allow candles to burn unattended and avoid drafts. Keep the burning bowl clean. If the candle smokes, wick shorten something. Only burn the candle on an incombustible base or use a self-extinguishing candle.

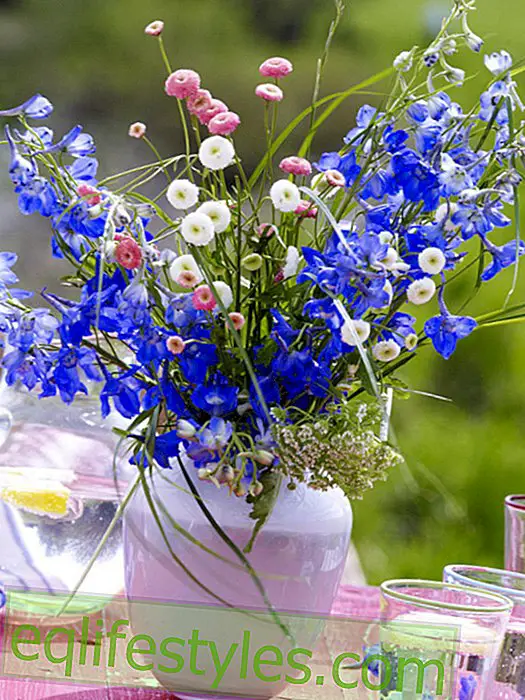
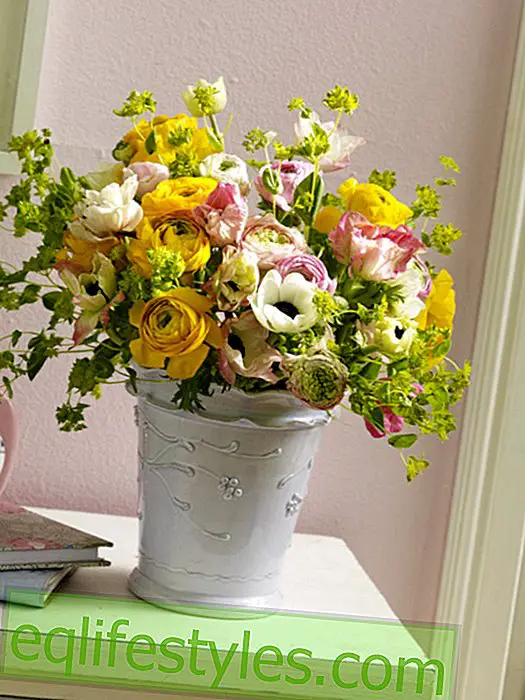
You need this for the bouquet:
- Flowers: 2 stems Snowberry, 2 stalks Silver leaf, 4 stalks Eucalyptus, 4 Eucharis, 6 Protea, white (Serruria) 10 white roses, filled
- Vase (Muuto, Elevated Vase, pink, 98 €, www.scandinaviandesigncenter.de)
- Pendant (set, 42 pendants, christmas on market street, ca. 5 €, www.idee-shop.com)
- secateurs
- knife
And that's how easy it is:
1. Free the stems of the flowers from excess green.
2. Assemble flowers to a mixed bouquet, making the stems spirally.
3. Shorten the bouquet to the vase length with the rose scissors.
4. Cut the ends of the stems diagonally for better water absorption.
5. Put the bouquet loose in the water-filled vase.
6. Decorate vase with pendant.
Props: Cup: teacup set, 8 pcs, pink striped, porcelain, 69.95 €, www.impressionen.de, cones: Greengate, tree decoration "Acorn" (Warm Gray / White), size diameter 4.1 cm / 7.7 cm high, material: glass, 4.90 €, www.nostalgieimkinderzimmer.de, tea light: tea light set, House Doctor, 29.90 €, www.kindofmine.com, lace tablecloth: H & M home, 29.99 €, 120 x 120 cm, www.hm.com, linen tablecloth: CASAgent, 100% linen, prewashed, 145 x 250 cm, 134 €, www.hofgarten-oldenburg.de, picture frame: Bloomingville, gold, picture "Laughter is. .. "30x40 cm, 57 €, www.mein-pantopolium.de

That's what you need for the napkin deco:
- Napkin (pink, Casagent, 10.95 €, www.nostalgieimkinderzimmer.de)
- golden ribbon (roll, about 4 €, www.idee-shop.com)
- Cinnamon sticks (supermarket)
- Eucalyptus (from the florist)
- Blossom (Eucharis, from the florist)
- scissors
- secateurs
And that's how easy it is:
1. Iron napkin, fold in half and roll up.
2. Cut the ribbon to a length of approx. 50 cm, place it under the napkin and wrap it twice around the napkin.
3. Place the cinnamon stick in the center of the ribbon and knot the ribbon at the top.
4. Put the eucalyptus or flower under the gold band and place the napkin on the plate.
Props: Plate: Maxwell & Williams, White Rose series, 22.5 cm, porcelain, 10.95 €, www.maxwellandwilliams.de Saucer: Teacup set, 8 pcs, pink striped, porcelain, 69.95 Û, www.impressionen.de Candlesticks: own

What you need for the meringue ring with name tag:
- Cup
- baking paper
- Meringue: 4 egg whites, 220 g powdered sugar
- bowl
- hand mixer
- Airtight bag
- scissors
- Dekoband cream (about 20 cm)
- Embroidery thread pink (about 25 cm)
- Paint pen white (craft shop)
- Label gold (VINTER 2015, 42 pcs, gold, silver, 0, 99 €, IKEA) Tissue paper pink (craft shop)
- spigot
- pencil
- scissors
- embroidery needle
- Cutter with cutting pad
And that's how easy it is:
1. Draw around a cup on baking paper circles with a diameter of about 8 cm.
2. Beat the egg whites in a bowl with the hand mixer until stiff.
3 Gradually sift the icing sugar into the bowl and beat for about 6 minutes until the mixture shines and is stiff.
4. Add the mixture to a bag and, if necessary, push out the bubbles.
5. Cut off a tip of the sack bag.
6. Next to the circle line dots of egg mass.
7. Dry the wreaths at about 70 degrees in the oven for one hour.
8. Turn off the oven and allow the wreaths to cool for another hour with the door open.
9. Cut the decorative ribbon to a length of approx. 20 cm and pull it through the garland.
10. Using an embroidery needle from below, pull the pink embroidery thread through the doubled decorative ribbon so that both ends of the yarn come out of the top of the decorative ribbon.
11. Using a white paint pen, write the name of the guest on the golden label and let it dry.
12. Cut the label with the cutter, thread one end of the pink yarn and knot the yarn with a bow.
13. Lay the wreath on tissue paper on the plate and place a pin in the middle.

What you need for the gift boxes:
Biscuit recipe: 380 g flour 250 g butter 100 g powdered sugar 3 egg yolks 1 packet vanilla sugar Flour for the work surface Rolling pin Glass with pattern in the bottom round biscuit cutter baking paper
- Computer, printer and paper
- Cardboard (pink, white, gold, craft shop)
- Stickkarn white, pink (craft shop)
- Paint pen gold, white (craft shop)
- Tissue paper, pink (craft shop)
- scissors
- pencil
- Cutter with cutting pad

And that's how easy it is:
1. Mix all ingredients for the dough, knead and chill for 1 hour.
2. Roll out the dough and press the bottom of the glass into the dough.
3. Cut out with a round biscuit cutter, place on a baking tray lined with baking paper and bake at 180 degrees for approx. 18 minutes.
4. Let the biscuits cool down.
5. Download, print and cut the box and lid template.
6. Place the template on the cardboard and draw with the pencil.
7. Cut and fold the template so that the pencil lines are inside. Glue box and lid together with double-sided adhesive tape.
8. Cut tissue paper, place in the box and place cookies in the box.
9. Place the lid on the box and knot it with embroidery thread.
10. Cut out small square signs (approximately 3 x 3 cm) from the cardboard box, label them with the paint pen and place them under the yarn on the lid.